This tutorial builds a practical content workflow: provide a topic and keyword brief, let an AI agent prepare a structured article, review the exact draft, and create it in WordPress as a draft. Nothing is published automatically.
The fastest route is the AI WordPress Blog Draft Factory template. It includes the manual trigger, draft-writing agent, human approval, WordPress Create Post tool, sample payload, and launch checklist.
What you need
- A text-capable AI account.
- A WordPress user with Author, Editor, or Administrator access.
- The public URL of the WordPress site.
- A WordPress Application Password, not the normal account password.
- A test topic and verified facts that are safe to use in a draft.
Use a staging site for the first test when possible. If you use a production site, keep the connection and workflow post status set to Draft.
1. Connect WordPress
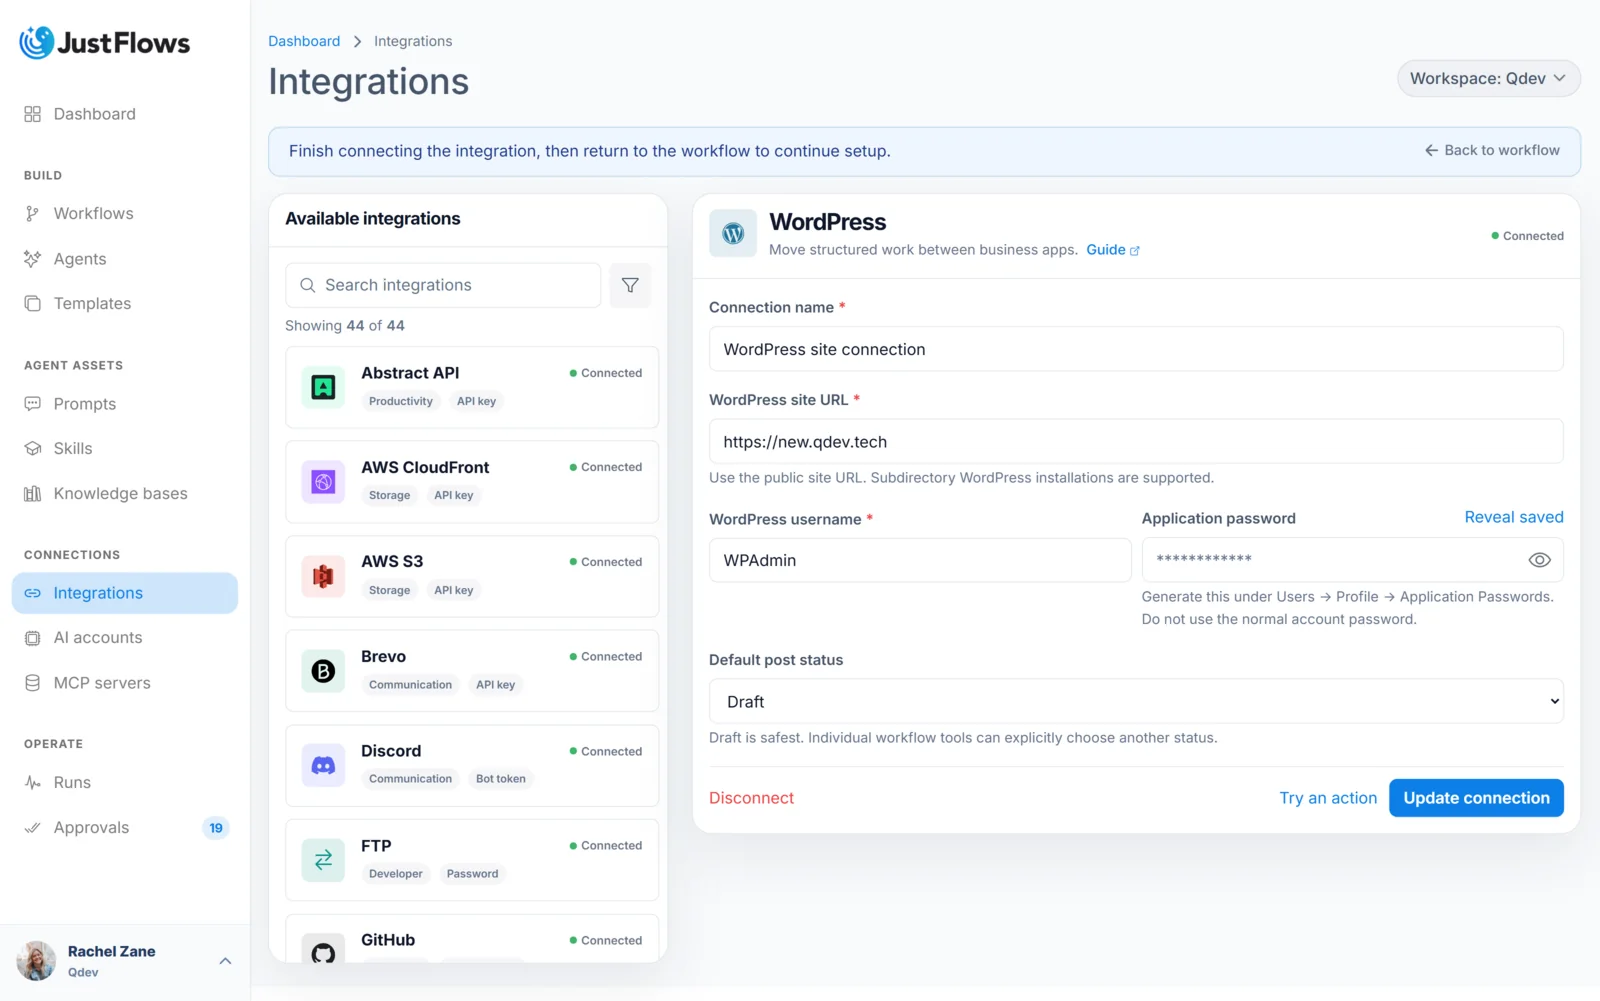
Open Integrations, choose WordPress, and create a connection. Enter a descriptive connection name, the public site URL, WordPress username, and Application Password. WordPress generates application passwords under the user profile; they can be revoked independently from the normal login password.
Set Default post status to Draft. Save the connection, then use the available read action to load recent posts. This verifies the URL, credentials, and basic permissions without changing the site.
If the connection fails, confirm that the REST API is reachable, the site URL includes any WordPress subdirectory, the username matches the application password owner, and security plugins or proxies are not blocking authenticated API requests.
2. Launch the template
Open Templates and select AI WordPress Blog Draft Factory. Review its outcome, runtime path, requirements, and included manual scenario. Launch it to create a draft workflow in your workspace.
In the builder, open the setup checklist. Select the AI account and agent required by the template, choose the WordPress connection, and confirm that the WordPress tool remains configured to create a draft or pending-review post.
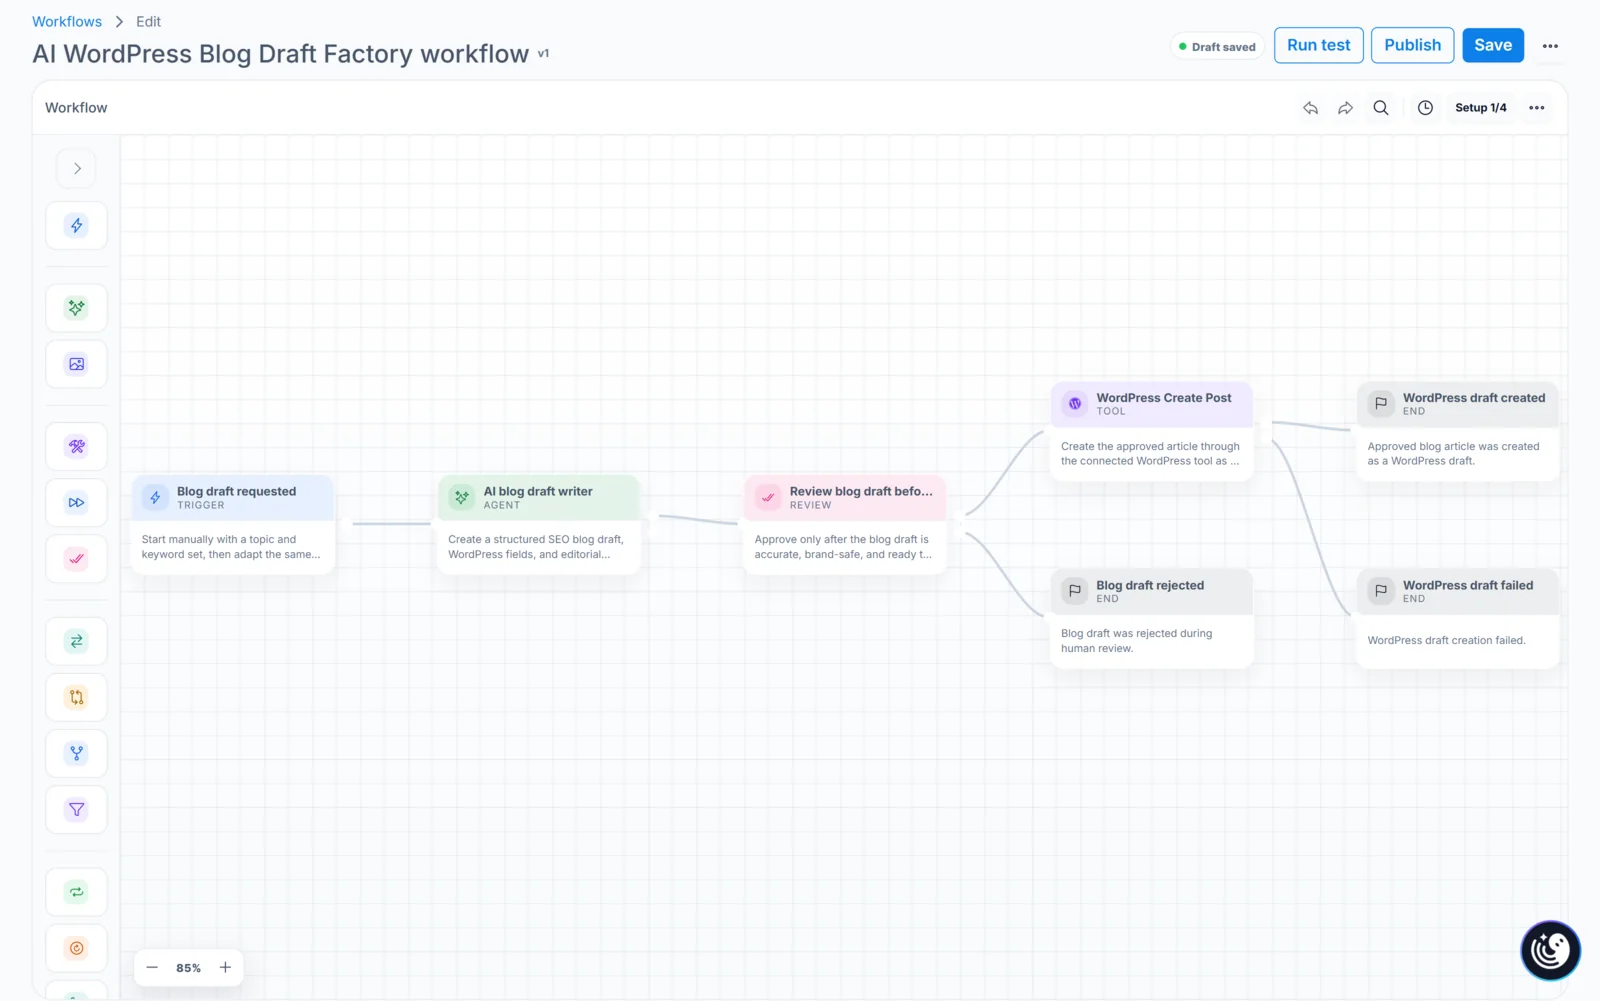
The approved workflow path should be easy to read:
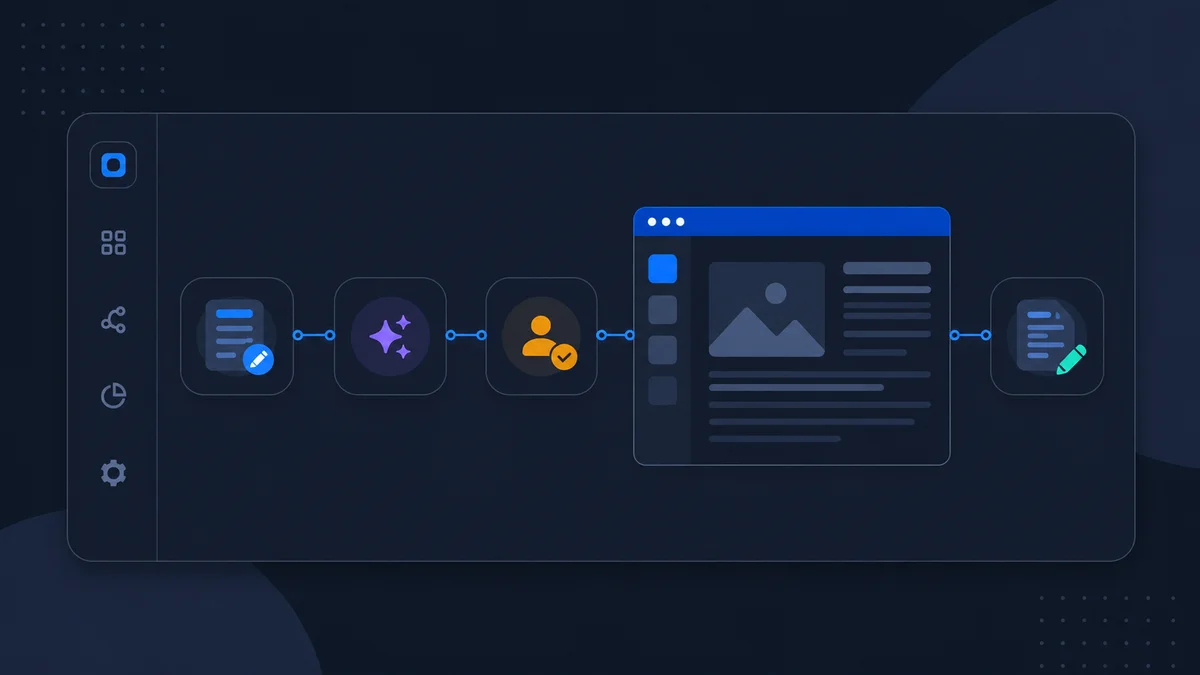
Blog draft requested → AI blog draft writer → Review blog draft → WordPress Create Post → WordPress draft created
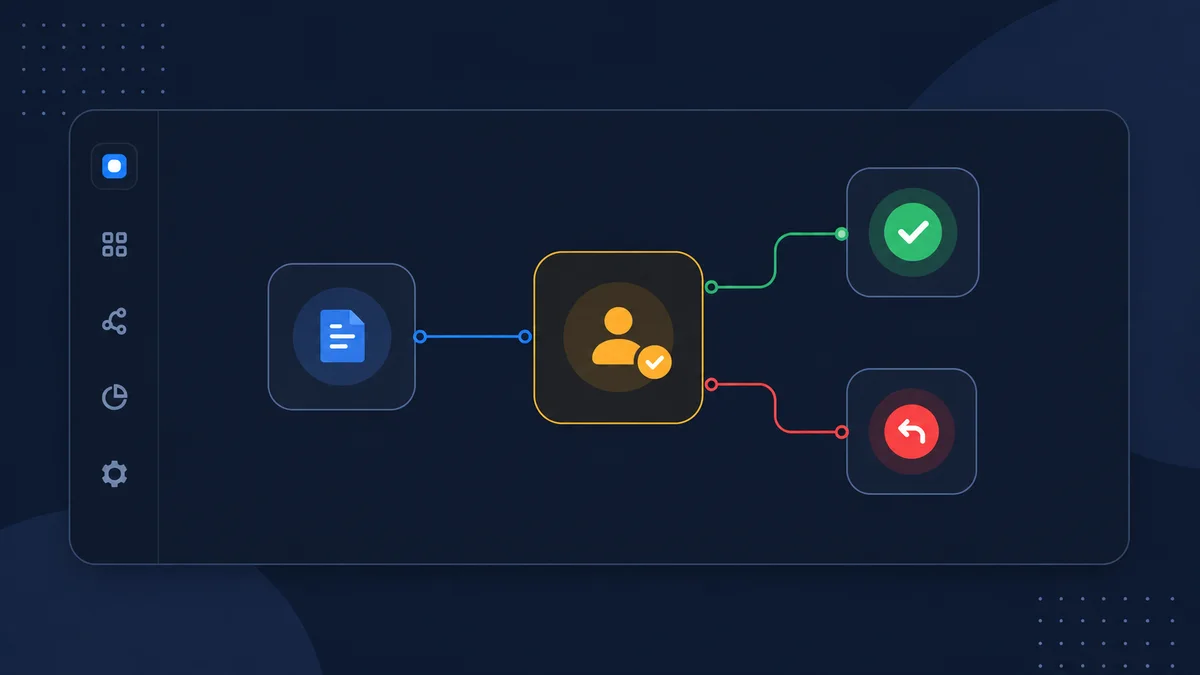
A rejected review ends at Blog draft rejected, while a failed WordPress action ends at WordPress draft failed. Neither branch should be mistaken for a successful draft creation.
3. Prepare a grounded content brief
The quality of the draft depends on the quality of the supplied information. A useful test payload includes:
- Topic and primary keyword.
- Relevant secondary keywords.
- Target audience.
- Brand name and desired tone.
- Expected chapter count and approximate length.
- Verified claims, product facts, examples, or source notes the article may use.
- The requested WordPress status, which should remain draft.
Keywords do not give an agent permission to invent evidence. If an article needs statistics, quotations, pricing, product capabilities, or customer claims, provide verified material or add a research and source-review stage before drafting.
4. Run the saved scenario
Select Run test and open Saved tests. Start with the included sample scenario, replacing any sample brand or topic with your test brief. Review every destination value before starting.
The agent should produce separate fields for the title, slug, excerpt, HTML body, metadata guidance, and featured-image prompt. Structured fields make the approval easier to review and map cleanly into the WordPress tool.
5. Review the draft
When the run reaches approval, open the request and review the article as an editor, not only as an automation operator:
- Does the title accurately describe the article?
- Are product claims supported by the supplied brief?
- Does the structure answer the reader's actual question?
- Are headings, lists, and examples useful rather than repetitive?
- Are internal-link placeholders and calls to action appropriate?
- Does the HTML avoid unsafe embeds or unwanted scripts?
- Is the requested WordPress status still draft?
Reject the first test and confirm that no WordPress post is created. Run it again and approve only after the content and destination are correct. This proves the workflow's safety behavior as well as its happy path.
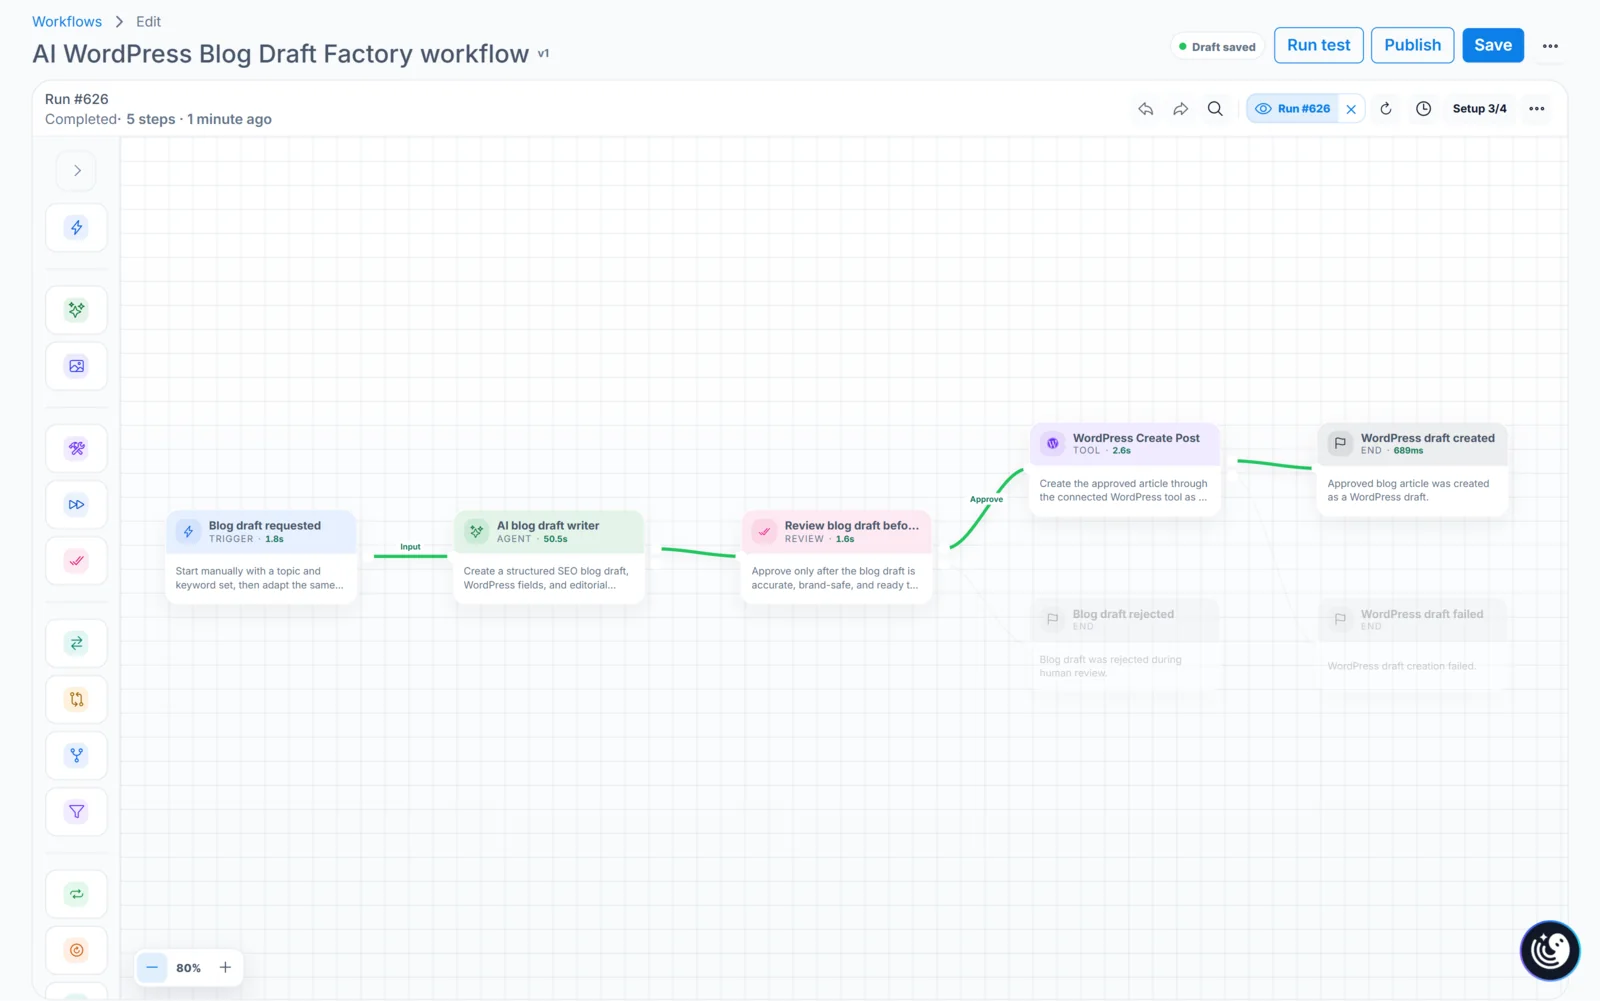
After approval, the builder run view should highlight the executed path through WordPress Create Post to WordPress draft created, while the rejected and failed branches remain unused.
6. Verify the WordPress result
After approval, the WordPress Create Post step should return the created post identifier, status, and link information supplied by the provider. Open WordPress separately and confirm:
- The post exists once and is still a draft.
- The title, slug, excerpt, and body match the approved values.
- HTML formatting displays correctly in the active editor and theme.
- No unexpected category, tag, author, or publish date was assigned.
The workflow creates an editorial draft; it does not replace final fact-checking, link review, image selection, accessibility review, or WordPress preview across device sizes.
Common problems
- Authentication fails: generate a new Application Password and confirm the site URL and username.
- Reading works but creation fails: check the WordPress role and any REST API restrictions.
- The agent returns malformed fields: tighten its structured response contract and test again.
- The approval lacks context: expose the exact title, body, destination, and status the tool will use.
- Duplicate drafts appear: verify the external site before retrying a timed-out create action and consider processed-request tracking.
- Formatting looks wrong: inspect the approved HTML and WordPress theme behavior rather than asking the publishing tool to rewrite content.
Make it production-ready
Once the manual scenario is dependable, you can connect the workflow to a content queue, form, spreadsheet, or scheduled topic source. Keep approval in place, limit which users and destinations the WordPress connection can access, and monitor the first production runs.
Draft creation is a strong automation boundary: JustFlows handles repeatable preparation and delivery, while your editorial process keeps responsibility for accuracy and publication.